
Sharpen and Maintain Garden Pruning Shears for Clean Cuts
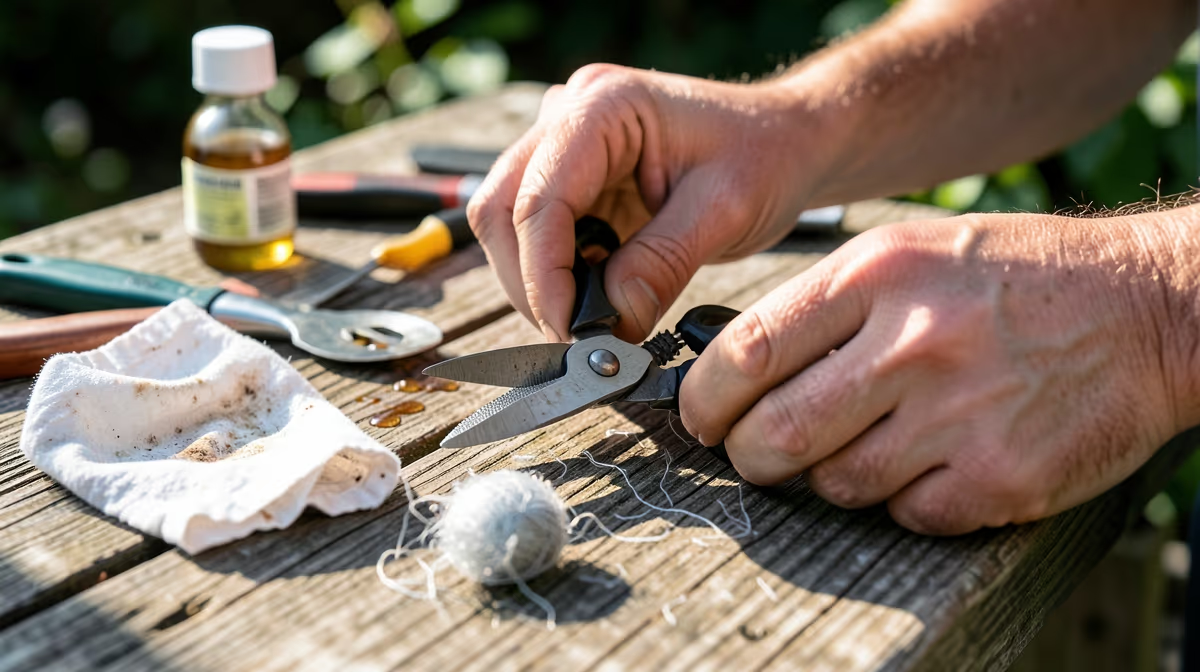
Clean, sharp cuts are essential for keeping your plants healthy and preventing the spread of diseases. When your tools grow dull, they tear through stems rather than slicing them, which leaves jagged wounds that invite pests. Knowing how to sharpen and maintain garden pruning shears ensures your plants heal quickly and your tools last a lifetime. This simple maintenance routine takes less than fifteen minutes and requires only a few basic workshop supplies.
Regularly sharpening and oiling your pruning shears prevents plant tissue damage and extends the life of your tool.
Signs Your Pruning Shears Need Maintenance
Before you begin, understand when your tools need attention. Neglecting your shears makes work harder and harms your plants. Look for these signs:
- Crushed stems: The branch fibers bend or tear rather than slicing cleanly.
- Hand fatigue: Squeezing requires excessive force to make simple cuts.
- Sticking blades: The shears do not spring back open due to sap or rust in the pivot joint.
- Rust or nicks: You see orange corrosion or feel rough divots on the edge.
- Blade gap: Light is visible between closed blades because the pivot nut is loose.
Tools and Materials for the Job
You do not need specialized workshop equipment. Gather these basic items before starting:
| Tool or Material | Primary Purpose | Best Option |
|---|---|---|
| Warm soapy water | Removes dirt, soil, and fresh sap | Dish soap and warm water |
| Wire brush or steel wool | Scrubs away hardened sap and rust | Fine-grit steel wool (0000 grade) |
| Sharpening tool | Restores the sharp cutting bevel | Diamond file or medium-grit whetstone |
| Lubricating oil | Protects the metal and eases joint movement | 3-in-One oil, mineral oil, or camellia oil |
| Disinfectant | Kills plant pathogens and disease spores | Rubbing alcohol (70% isopropyl) |
| Clean rags | Wipes away residue, water, and excess oil | Microfiber or cotton cloths |
Deep Cleaning and Disinfection
Never sharpen dirty blades, as soil particles and dried sap act as abrasives that ruin your file. Follow these steps to clean your shears first:
- Wash the tool: Scrub the shears in warm, soapy water to remove soil and fresh sap.
- Remove sap and rust: Use fine steel wool to scrub away rust. Apply a little mineral spirits or WD-40 to dissolve stubborn, sticky sap.
- Dry completely: Rinse and dry the tool thoroughly with a clean rag to prevent new rust.
- Disinfect: Wipe the blades with rubbing alcohol to kill any plant pathogens.
How to Sharpen the Cutting Blade
Most garden shears are bypass pruners, which cut like scissors with a sharp blade passing a thick anvil. You must only sharpen the beveled edge of the cutting blade. Sharpening the flat side creates a gap between the blades, causing them to tear leaves instead of cutting them.
If your shears disassemble easily, taking them apart makes sharpening simpler. Otherwise, just open them as wide as possible.
- Identify the bevel: Find the angled slope running along the outer edge of the cutting blade.
- Secure the tool: Hold the shears firmly in one hand, or clamp them gently in a vise with the cutting blade facing up.
- Align your file: Place a diamond file against the bevel, matching the existing angle of 20 to 30 degrees.
- Stroke outward: Push the file across the blade from the base to the tip in a smooth, sweeping motion. Always push away from your body; do not saw back and forth.
- Repeat: Keep the angle consistent and repeat this motion 10 to 15 times until a clean, shiny edge emerges.
Removing the Metal Burr
As you push metal away from the bevel, a rough metal ridge called a burr will form on the flat side of the blade. You must remove this to ensure clean cuts.
- Flip the blade: Look at the flat back side of the cutting blade.
- Lay the file flat: Place your file completely flat against this back side. Do not tilt it.
- Swipe once: Draw the file smoothly from the base of the blade to the tip. This single stroke removes the burr without creating a new bevel.
Lubrication and Reassembly
Protecting the steel from moisture ensures smooth operation and prevents rust.
- Lubricate: Put a few drops of mineral oil or 3-in-One oil on the pivot joint, spring, and blades.
- Reassemble: If you disassembled the shears, put them back together. Tighten the pivot nut so the blades meet closely without binding.
- Distribute: Squeeze the handles several times to spread the oil.
- Wipe excess: Use a dry cloth to wipe away excess oil to avoid attracting garden dirt.
- Test: Slice a piece of paper. A sharp tool will cut it cleanly without tearing.
Daily Maintenance Habits for Longevity
Simple daily habits will prevent major rust and keep your blades sharp longer.
A clean tool is your first line of defense against spreading fungal diseases like black spot or canker from plant to plant.
- Wipe blades clean with a dry cloth after every use to remove corrosive plant sap.
- Store shears in a dry place like a shed, never outside.
- Avoid cutting branches thicker than a pencil to prevent bending the blades.
- Do not use pruners to cut metal wire or roots covered in abrasive soil.
Frequently Asked Questions
Can I use WD-40 to lubricate my garden shears?
WD-40 is excellent for cleaning sap and rust off blades, but it is not a long-lasting lubricant. To keep the joints moving smoothly and prevent future rust, apply a few drops of dedicated tool oil, mineral oil, or 3-in-One oil instead.
How often should I sharpen my pruning shears?
For home gardeners, sharpening your shears once or twice a season is usually sufficient. However, if you notice the blades are tearing branches instead of slicing cleanly, you should sharpen them immediately regardless of when you last did it.
Do I need to take my shears apart to sharpen them?
While taking your shears apart allows for a more thorough cleaning and easier sharpening access, it is not strictly necessary. You can sharpen the blade successfully by simply opening the shears as wide as possible and holding them steady.
What angle should I use when sharpening pruning shears?
You should match the existing beveled angle of the blade, which is typically between 20 and 30 degrees. Hold your file flat against this angle and maintain it consistently with every stroke to avoid dulling the edge.
Why are my pruning shears bending branches instead of cutting them?
This usually happens because the pivot nut holding the blades together has loosened, leaving a gap between them. Tightening the nut slightly should resolve the issue and allow the blades to pass closely enough to make clean cuts again.
Conclusion
Keeping your tools in top condition does not take much time. When you regularly sharpen and maintain garden pruning shears, you protect your plants from damage, speed up your gardening chores, and ensure your tools last for years to come. Dedicating a few minutes to this routine at the start of each season will keep your garden thriving.


